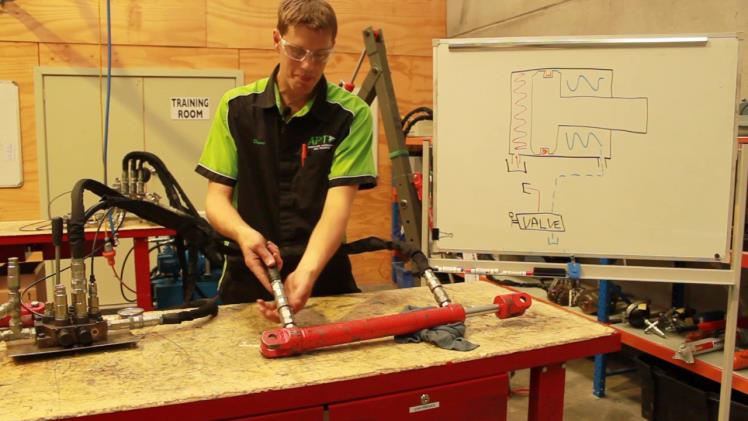
Hydraulic systems are widely used in different industries and applications for their unmatched power, precision, and versatility. They rely on hydraulic cylinders to perform various tasks, from lifting heavy loads to powering machinery and equipment.

However, hydraulic cylinders are not immune to wear and tear, leaks, and other issues that can affect their performance and reliability over time. Repacking a hydraulic cylinder is a simple and cost-effective solution to restore your system's functionality and avoid more severe problems.
In this article, we will discuss the crucial steps and tips to repack a hydraulic cylinder effectively. Whether you are a DIY enthusiast or a business owner, you can benefit from these guidelines to keep your hydraulic system in top shape.
What is Repacking A Hydraulic Cylinder?
Before delving into the repacking process, you need to know what repacking a hydraulic cylinder means. Repacking refers to the replacement of the cylinder's seals and other essential components that experience wear and tear over time. The seals play a vital role in keeping the hydraulic fluid contained, preventing leaks and contamination, and ensuring proper pressure and flow.
When seals wear out, they can cause hydraulic fluid to leak out or air to seep in, disrupting the system's operation and potentially damaging other components. Repacking involves taking the cylinder apart, replacing the damaged or worn seals, and reassembling it.
Repairs vs. Replacement
Repacking a hydraulic cylinder is a standard maintenance practice to extend its lifespan and prevent costly replacements. However, in some cases, repacking may not suffice, and you may need a complete cylinder replacement.
Here are some signs that you may need to replace your hydraulic cylinder:
- The cylinder is severely damaged, corroded or deformed
- The cylinder's rod is bent or cracked
- The cylinder has insufficient power or speed
- The cylinder's stroke is too short or too long
- The cylinder's bore and rod diameter do not meet your application's requirements
If you encounter these issues, you should consult a hydraulic system expert to assess the situation and recommend the best course of action.
Steps to Repack A Hydraulic Cylinder
Now that you know when to repack or replace your hydraulic cylinder let's explore the steps to repack the cylinder accurately. Note that the following steps may vary depending on your cylinder's model, size, and specific requirements, so always consult the manufacturer's manual or an expert before proceeding.
1. Prepare for the Job
Before you start repacking, make sure you have all the tools and materials you need, such as:
- Cylinder wrench
- Packing extractor or screwdriver
- External snap ring pliers
- Internal snap ring pliers
- New seals and O-rings
- Hydraulic fluid
- Clean rags
- Safety gear (gloves, goggles, etc.)
Also, drain the hydraulic fluid from the cylinder and clean it thoroughly to remove any dirt, debris, or contaminants.
2. Disassemble the Cylinder
Use the cylinder wrench to loosen the gland nut and remove it along with the piston, rod, and other components. Be careful not to damage any parts or scratch the bore or rod surfaces.
Then, use the packing extractor or a screwdriver to remove the old seals and O-rings from the gland and the piston. Ensure that you do not leave any pieces of the old seals inside the cylinder or damage the mating surfaces.
3. Inspect and Clean the Components
Inspect the removed components for signs of wear or damage, such as scratches, cracks, corrosion, or pitting. Check the bore and rod surfaces for any imperfections that may affect the sealing and operation.
If you notice any defects, consult an expert to determine the best course of action, which may involve repairing or replacing the parts.
Also, clean the components thoroughly with a lint-free cloth and hydraulic fluid. Avoid using solvents, detergents, or abrasive materials that can damage the surfaces or leave residues.
4. Install New Seals and O-rings
Now it's time to install the new seals and O-rings in the cylinders using the appropriate tools and procedures. Make sure you select the correct type, size, and material of seals that match your application and system requirements.
Use the external snap ring pliers to install the new O-ring at the gland's counterbore and the internal snap ring pliers to fit the new seal on the piston.
Ensure that the seals and O-rings are fitted snugly and do not twist or pinch during installation. Apply a thin layer of hydraulic fluid or sealant to lubricate the mating surfaces and prevent leaks.
5. Reassemble the Cylinder
Reassemble the cylinder components in the reverse order of disassembly, taking care to align the seals and O-rings correctly. Tighten the gland nut to the recommended torque using the cylinder wrench.
Once you have reassembled the cylinder, fill it with the appropriate hydraulic fluid to the recommended level and bleed any air from the system.
Test the cylinder's operation and check for leaks, noise, or damage. If everything is working correctly, you can resume your application.
Conclusion
Repacking a hydraulic cylinder is an essential maintenance task to keep your hydraulic system running efficiently and avoid the cost of a complete replacement. Follow the above steps and tips to repack your cylinder effectively and safely, and consult an expert if you encounter any issues or doubts.
Also, ensure you use high-quality seals and O-rings that can withstand the pressure, temperature, and other conditions of your application. Regular maintenance and inspection can help you detect and prevent issues early and save you time, money, and hassle in the long run.